How to change ad campaign settings
To set up an already created campaign, on the main control window, through the "Promotion" - "Your sites" menu, you must select the "Campaign settings" icon, opposite the campaign you want to set up:

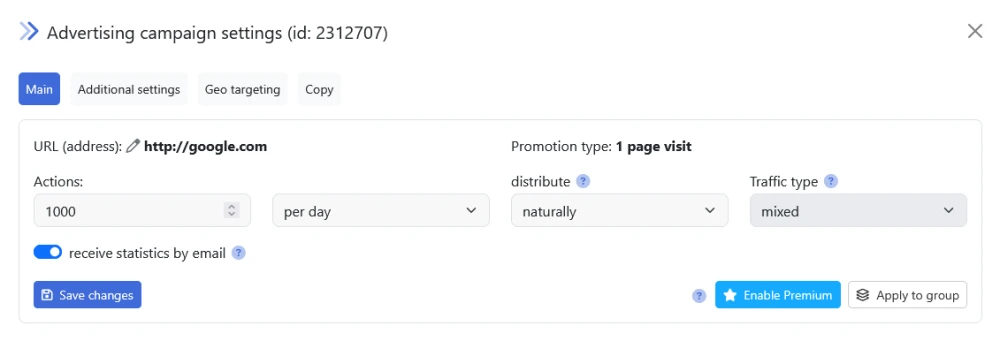
Next, a settings window will open in front of you, depending on the type of advertising campaign, the number of fields will change. The "Basic" tab will show the settings for navigation through the pages of your site, where you can change or supplement the necessary data, add additional clicks.
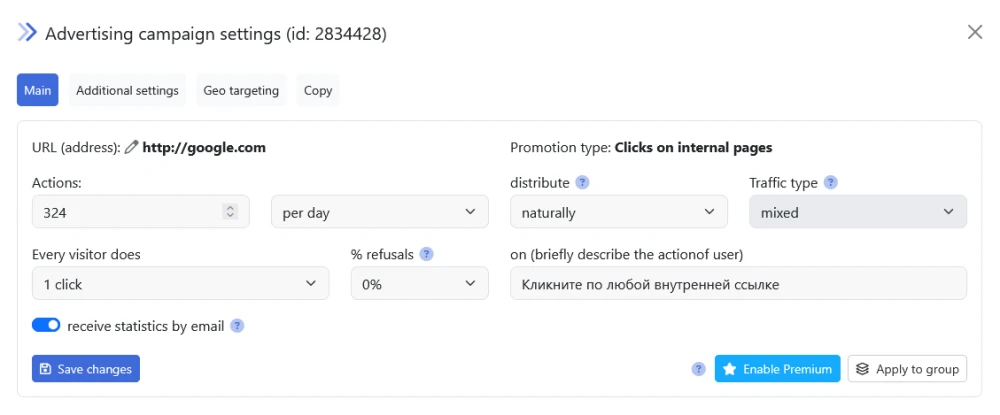
Also, when creating campaigns of certain types ("clicks on ads", "transitions to internal pages" and "visitors from search engines"), you can adjust the bounce rate. This is an important and useful setting that provides a much more natural experience for users visiting your site. If you set the bounce rate, it will turn out that the specified percentage of visitors will leave the site after the previous action (going to the main page or clicking on an ad unit), and in the statistics systems after this action a "bounce" will be counted. Independent visitors behave this way very often, since advertising is in most cases gives them not what users are looking for. At first glance, it may seem that this setting is unlikely to be useful, but in reality, a situation in which 1000 visitors all clicked on an ad and made a few more clicks on the target site is quite difficult to imagine. The percentage of bounce allows you to smooth it and ultimately has a positive effect on behavioral factors. In the screenshot below you can see the field that sets the bounce percentage highlighted.
Additional settings
In the "Advanced Settings" tab, you can:
-
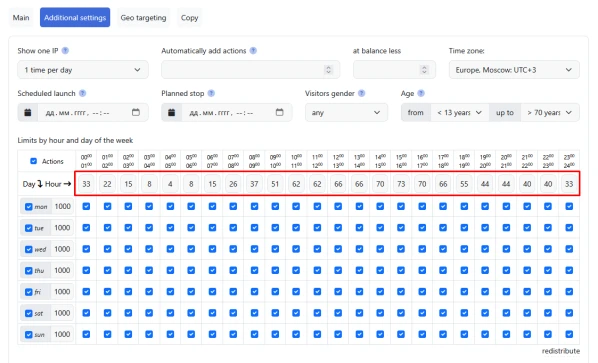
specify how many times your site should be shown to one IP.
-
set automatic deposit of funds for displaying the campaign. To do this, fill in the fields "automatically add impressions" and "if the balance is less". Impressions are added once per hour, if the site balance decreases below the set threshold, so you only need to replenish your account on time (distribution of funds to site accounts will occur automatically).
-
set the number of impressions by day of the week (in the "Day" column: Mon, Tue, Wed, etc.), as well as the number of impressions for each specific hour (in the "Hour" line: 00:00-01:00, 01 :00-02:00 etc.). 0 in hourly limits - equivalent to "no limits this hour". To not receive traffic at the selected hour - uncheck the hour.
-
set a scheduled start and a scheduled stop, that is, plan in advance the moment of the beginning and end of the advertising campaign.
-
set periodic fluctuations, that is, automatic changes in the frequency of visits according to the scheme that you can set in this field. For example, you can set a weekly increase in the number of impressions by 20, but no more than 1000 visits per day. Thus, if the daily limit is 500 visits, the number of visits will increase until it reaches 1000. This feature allows you to implement long-term promotion strategies and provides a more natural increase in traffic..
Please note that hour limits are updated daily and correspond to the current day, distributed depending on the specified daily visit limit.
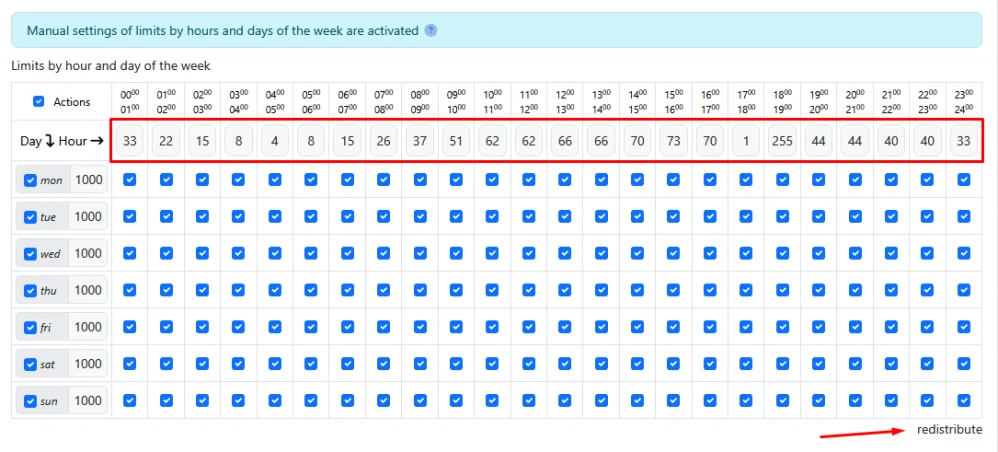
If you change the limits manually, then further changes in the limits in the "General" tab will not matter, and "fluctuations" in attendance will not be applied.
To restore the default settings, click "Redistribute" and save the changes.
Geographic targeting
The geo-targeting tab allows you to customize your site's impressions based on the geographic location of the desired visitors. You can specify the countries and regions whose visitors are of most interest to you. If you unchecked any countries and regions, then visitors from these areas will not get to your site. Since it is impossible to predict the exact number of visitors from a particular region, the figures are approximate, but close to the actual number of visits. This setting is useful when promoting the site in specific regions.
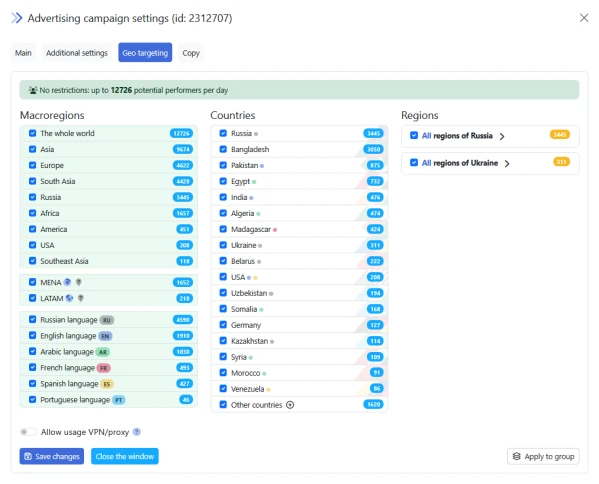
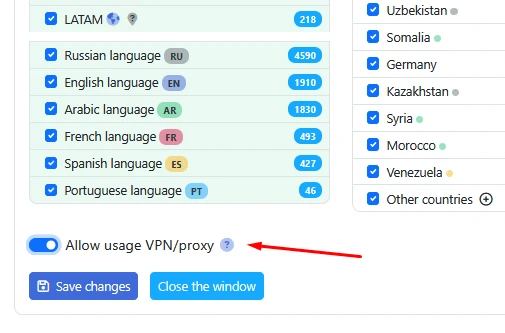
If connecting performers to virtual networks isn't critical for you, you can use the "Allow VPN/Proxy" option. This setting will help increase traffic. The task will also be received by users who aren't actually located in the selected location, but appear to be in the countries you selected, thanks to IP address spoofing using VPN and proxy services.
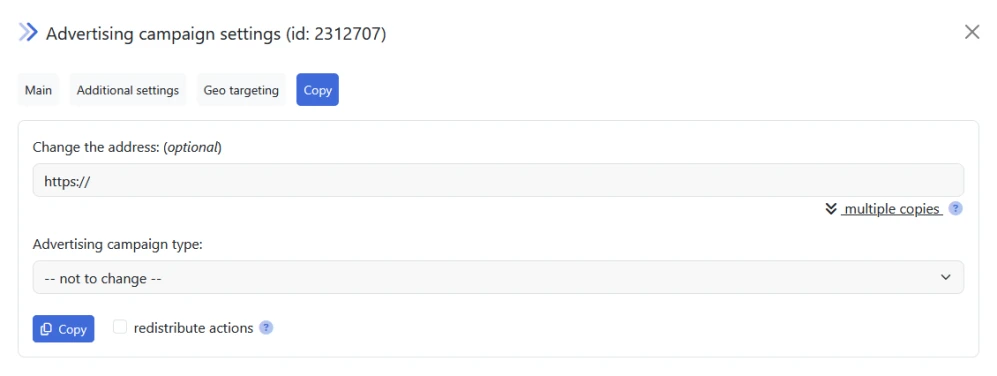
On the "Copy" tab, you can duplicate the currently configured advertising campaign.
Set the number of copies, for example one, and specify the url of your new campaign. If the field is left blank, the campaign will be copied unchanged.
Demographic targeting
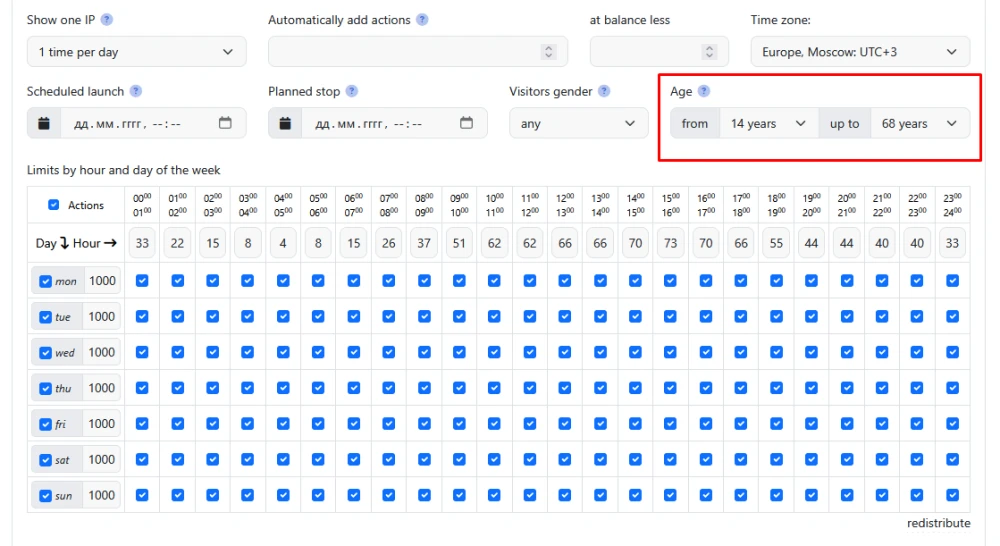
The IPweb.ru promotion service allows you to filter attracted visitors by such indicators as gender and age. This is most useful for social media promotion, although you can use this filter for website promotion as well.
Please note that when using demographic targeting, the number of visitors may noticeably decrease, as everyone who does not fall under the conditions you specify will be filtered out.
You can enable demographic targeting for both a new advertising campaign and an already created one. If you are creating a new campaign, then in the window that appears after you have saved all the settings, select the "Advanced settings" tab and in the second line specify the desired gender and age range of visitors. The process is shown in the screenshot below.
If you want to enable demographic targeting for an existing advertising campaign, then find it on the "Your Sites" page, open it for editing (the icon in the first column on the left), then follow the same operations as when adding a filter by gender and age in the new campaign.
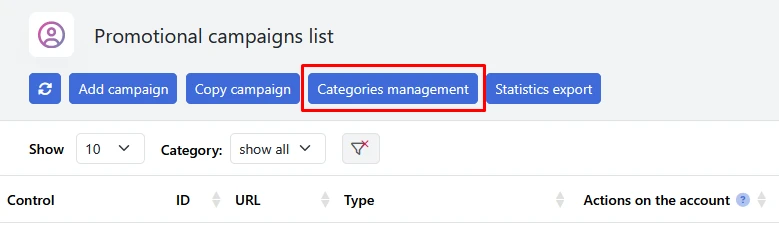
Unique IPs for categories
In addition, you can set up unique IPs for categories. This means that a visitor who has viewed one site from a category with this setting will not be able to view others. This setting makes traffic more valuable, but reduces its total amount.
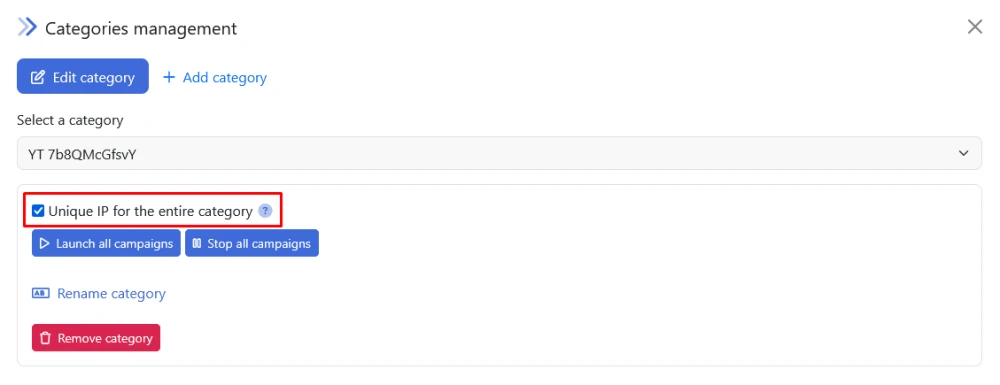
To set the "Unique IPs for a Category" setting, click the "Manage Categories" button
Then, in the window that opens, select the category you are interested in and check the box indicated in the picture. Now only users with a unique IP will be selected for it.
Rate the material: